powerlevel10k: 最好看,方便,实用的命令行主题 |
您所在的位置:网站首页 › git y › powerlevel10k: 最好看,方便,实用的命令行主题 |
powerlevel10k: 最好看,方便,实用的命令行主题
|
Zsh-Powerlevel10k: 最好看,方便,实用的命令行主题
https://www.cnblogs.com/zhangtianli/p/p10k.html
https://blog.csdn.net/qq_40938528/article/details/117338066
目录Zsh-Powerlevel10k: 最好看,方便,实用的命令行主题安装LinuxWindows安装 zsh 插件更新源设置使用 sudo 时免输密码重置root密码字体问题配置这是左边区域的配置这是右边区域的配置
项目地址 sudo yum remove zsh -y sudo yum install git gcc perl-ExtUtils-MakeMaker ncurses-devel -y git clone [email protected]:luoxian1011/zsh_home.git sh zsh_home/install_omz.sh sudo chmod -R 700 ~/.oh-my-zsh/custom/plugins/ sed -i 's/ZSH_THEME.*/ZSH_THEME="powerlevel10k\/powerlevel10k"/g' .zshrc sed -i 's/plugins.*/plugins=(git zsh-autosuggestions zsh-syntax-highlighting pip)/g' .zshrc source .zshrc 安装 Linux 1、查看系统当前使用的shell echo $SHELL 2、设置默认zsh chsh -s /bin/zsh 安装 Zsh # sudo yum install zsh git -y sudo apt install zsh -y 安装 Oh-My-Zsh 方法 命令 curl sh -c "$(curl -fsSL https://raw.githubusercontent.com/ohmyzsh/ohmyzsh/master/tools/install.sh)" wget sh -c "$(wget -O- https://raw.githubusercontent.com/ohmyzsh/ohmyzsh/master/tools/install.sh)" # 国内镜像 sh -c "$(wget -O- https://gitee.com/mirrors/oh-my-zsh/raw/master/tools/install.sh)" 安装 P10k git clone --depth=1 https://github.com/romkatv/powerlevel10k.git ${ZSH_CUSTOM:-$HOME/.oh-my-zsh/custom}/themes/powerlevel10kGitee 镜像 git clone --depth=1 https://gitee.com/romkatv/powerlevel10k.git ${ZSH_CUSTOM:-$HOME/.oh-my-zsh/custom}/themes/powerlevel10k在 ~/.zshrc 中设置 ZSH_THEME # sed -i 's/ZSH_THEME.*/ZSH_THEME="powerlevel10k\/powerlevel10k"/g' .zshrc ZSH_THEME="powerlevel10k/powerlevel10k" 重启命令行 source .zshrc 设置 P10k p10k configure - Character Set : Unicode [多图] # 我的p10k配置 https://gitee.com/luoxian1011/files/raw/master/.p10k.zsh
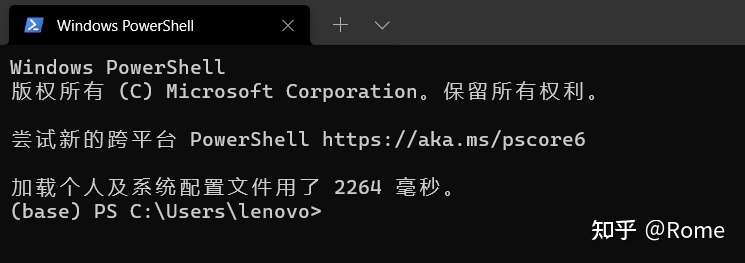
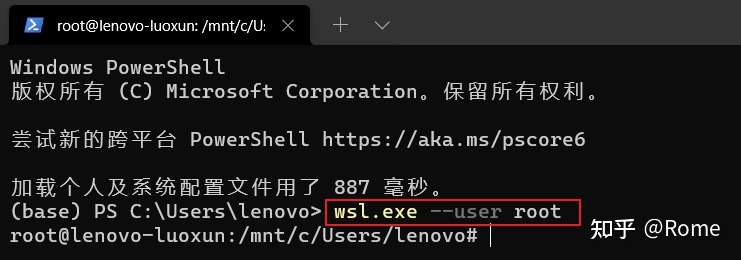
然后... 完成! 是不是很简单? Windows什么? 你居然在用 Windows? 洗洗睡吧。 什么? 你居然在用 Win10, 好像有希望! 打开你的 WSL (我死了) 和 Linux 一毛一样 既然都用 WSL 了,怎么不装个 Linux 呢? 安装 zsh 插件 # git clone加速 git clone https://github.com/... ==> git clone https://gitclone.com/github.com/... # 补全提示 git clone https://github.com/zsh-users/zsh-autosuggestions ${ZSH_CUSTOM:-~/.oh-my-zsh/custom}/plugins/zsh-autosuggestions # 高亮 git clone https://github.com/zsh-users/zsh-syntax-highlighting.git ${ZSH_CUSTOM:-~/.oh-my-zsh/custom}/plugins/zsh-syntax-highlighting在 ~/.zshrc 中添加: plugins=(git zsh-autosuggestions zsh-syntax-highlighting pip)再使用 source ~/.zshrc 应用修改。 更新源 备份原有软件源文件 sudo cp /etc/apt/sources.list /etc/apt/sources.list.bak_yyyymmdd 修改sources.list文件 # 修改为如下地址: sudo vi /etc/apt/sources.list #163源 deb http://mirrors.163.com/ubuntu/ bionic main restricted universe multiverse deb http://mirrors.163.com/ubuntu/ bionic-security main restricted universe multiverse deb http://mirrors.163.com/ubuntu/ bionic-updates main restricted universe multiverse deb http://mirrors.163.com/ubuntu/ bionic-proposed main restricted universe multiverse deb http://mirrors.163.com/ubuntu/ bionic-backports main restricted universe multiverse deb-src http://mirrors.163.com/ubuntu/ bionic main restricted universe multiverse deb-src http://mirrors.163.com/ubuntu/ bionic-security main restricted universe multiverse deb-src http://mirrors.163.com/ubuntu/ bionic-updates main restricted universe multiverse deb-src http://mirrors.163.com/ubuntu/ bionic-proposed main restricted universe multiverse deb-src http://mirrors.163.com/ubuntu/ bionic-backports main restricted universe multiverse 更新系统软件源 # 执行命令,更新系统软件源地址: sudo apt-get update sudo apt-get upgrade # 安装lrzsz tree sudo apt-get -y install lrzsz tree # 安装 build-essential 软件包集合 (其中就包括 gcc、G ++ 和 make 等) sudo apt install build-essential 设置使用 sudo 时免输密码每次使用 sudo 时都需要输入密码确实烦人, 毕竟是私人电脑, 安全性有锁屏密码保护就可以了, 为了使用方便, 不仿取消使用 sudo 时需要输入 root 用户密码的设定: 同时按下 ctrl + alt + t 打开终端, 输入 sudo vi /etc/sudoers , 在打开的文件中, 将 %sudo ALL=(ALL:ALL) ALL改为: %sudo ALL=(ALL:ALL) NOPASSWD:ALL即可。 重置root密码 以管理员身份打开 PowerShell
⇡⇡⇡ 诶, 你怎么说装好了呢, 明明就不行, 太菜了! ⇡⇡⇡ 这个嘛,因为里面有这个
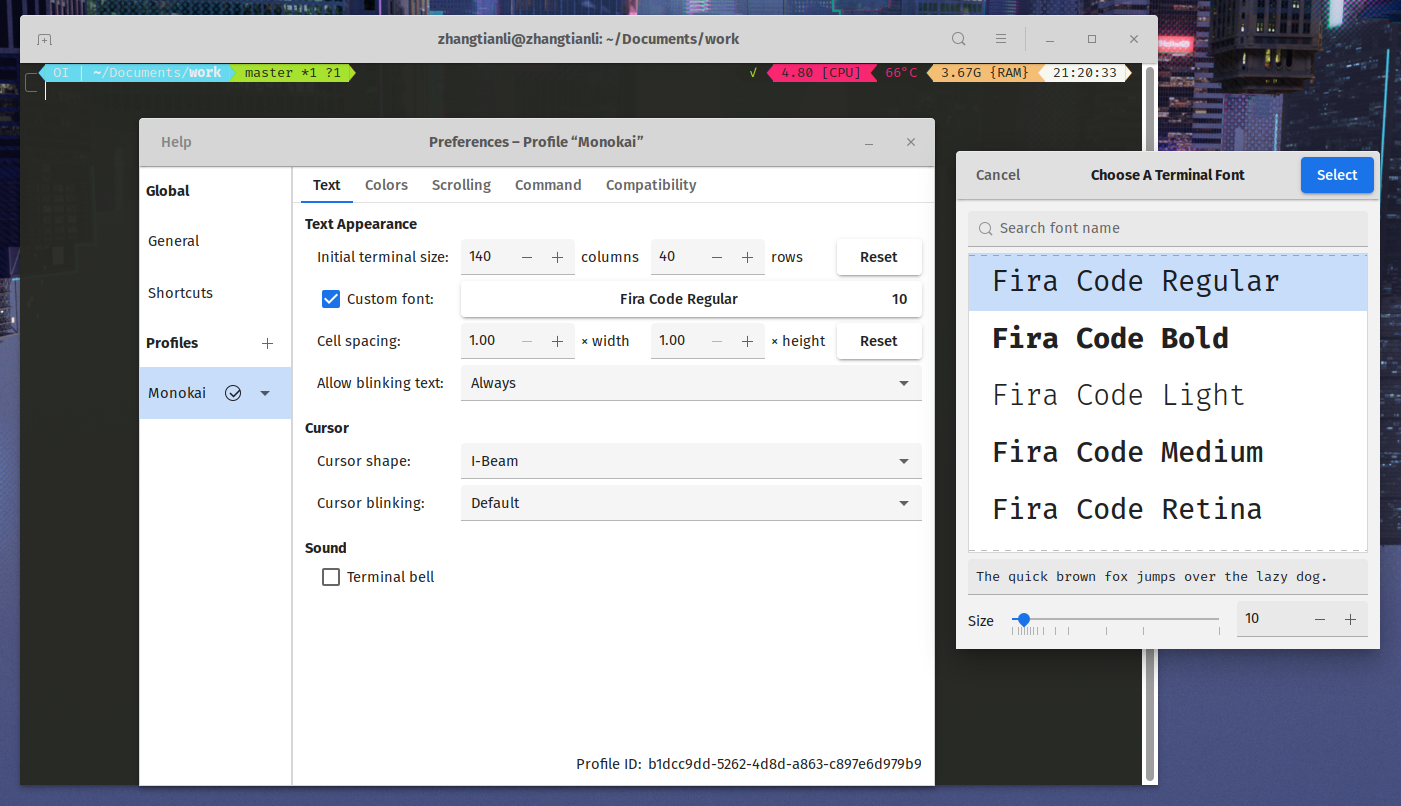
个人推荐 Fira Code 和 MesloLGS NF 或可以使用这个仓库 https://github.com/powerline/fonts 中的任意字体。 安装 Hack Nerd Font 字体官网链接:https://nerdfonts.com/ 下载字体 然后安装(Ubuntu Nerd Font Complete.ttf) Hack.zip
Gnome-terminal 在 Gnome-terminal(Ubuntu 默认终端) 中在 Preference(首选项)中可以修改。⇣ 如下图所示。⇣
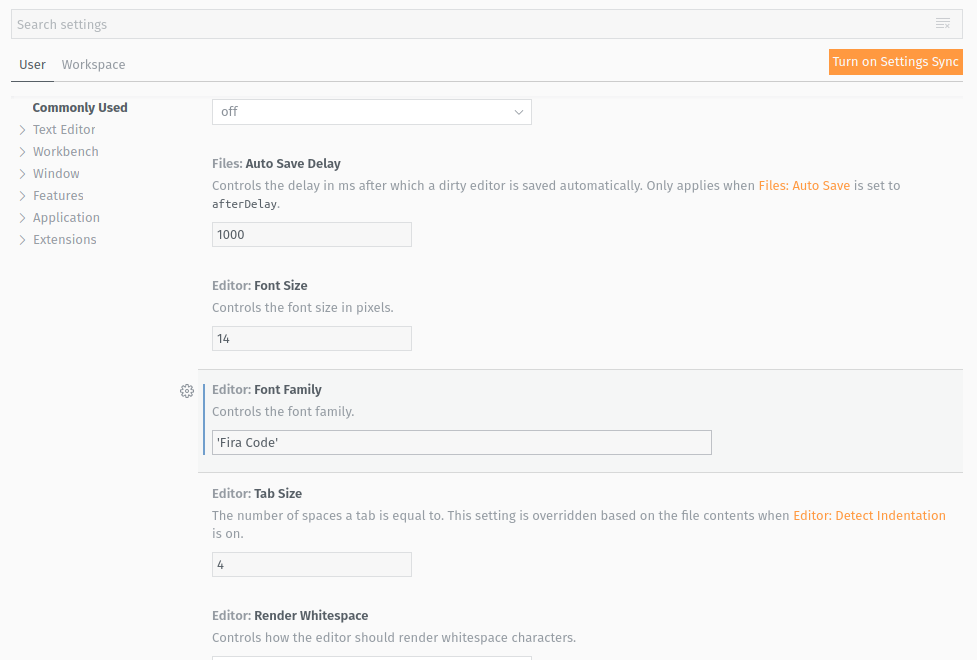
VScode 在 VScode 中可以按下 Ctrl + , 直接在 Settings(设置)中修改。⇣ 如下图所示。⇣
这个有人不会吗? 配置配置文件存在 ~/.p10k.zsh 中,打开可以更改内部设置。具体方式这里不过多叙述,需要了解可以查看 原仓库 Readme 这是左边区域的配置 32 | # The list of segments shown on the left. Fill it with the most important segments. 33 | typeset -g POWERLEVEL9K_LEFT_PROMPT_ELEMENTS=( 34 | # =========================[ Line #1 ]========================= 35 | # os_icon # os identifier 36 | dir # current directory 37 | vcs # git status 38 | # =========================[ Line #2 ]========================= 39 | newline # \n 40 | # prompt_char # prompt symbol 41 | ) 这是右边区域的配置 47 | typeset -g POWERLEVEL9K_RIGHT_PROMPT_ELEMENTS=( 48 | # =========================[ Line #1 ]========================= 49 | status # exit code of the last command 50 | command_execution_time # duration of the last command 51 | background_jobs # presence of background jobs 52 | direnv # direnv status (https://direnv.net/) 53 | asdf # asdf version manager (https://github.com/asdf-vm/asdf) 54 | virtualenv # python virtual environment (https://docs.python.org/3/library/venv.html) 55 | anaconda # conda environment (https://conda.io/) . | . . | . . | . 101 | todo # todo items (https://github.com/todotxt/todo.txt-cli) 102 | # swap # used swap 103 | time # current time 104 | # =========================[ Line #2 ]========================= 105 | newline 106 | # ip # ip address and bandwidth usage for a specified network interface 107 | # public_ip # public IP address 108 | # proxy # system-wide http/https/ftp proxy 109 | # battery # internal battery 110 | # wifi # wifi speed 111 | # example # example user-defined segment (see prompt_example function below) 112 | )取消主矢或添加注释可以增添显示的功能方块 各个功能的作用
这些功能中比较有用的,比如: 英文名 作用 status 上次运行的指令的运行返回值 command_execution_time 上次指令运行经历的时间 time 显示时间 load CPU 负载 ram 显示剩余内存通过修改 typeset -g POWERLEVEL9K_***_VISUAL_IDENTIFIER_EXPANSION='⭐' ^~~ 这里可以改变某功能的图标 |

 , 所以需要安装专门的控制台字体。

【本文地址】
今日新闻 |
推荐新闻 |